In C#, when it comes to error handling and propagating exceptions, developers have two options: using the throw keyword with an exception object (throw ex) or utilizing the throw keyword without an exception object (throw). Although both methods serve the purpose of raising exceptions, it’s important to understand the differences between them. In this blog post, we will explore the distinctions between throw ex and throw in C# through simple examples, shedding light on their appropriate usage scenarios.
Throwing Exceptions with throw ex:
The throw ex syntax allows you to create and throw a new exception object. Let’s consider the following example:
try
{
    // Some code that may cause an exception
    throw new Exception("An error occurred.");
}
catch (Exception ex)
{
    Console.WriteLine(ex.Message);
    // Further handling or logging
}
In the above code snippet, we explicitly create a new Exception object using the throw new Exception("An error occurred.") statement. The exception is then caught in the catch block, allowing us to handle or log the error. This approach is useful when you encounter an exceptional condition that requires specific error messages or additional information.
Throwing Exceptions with throw:
The throw keyword without an exception object is used to rethrow an existing exception within a catch block. Consider the following example:
try
{
    // Some code that may cause an exception
    throw;
}
catch (Exception ex)
{
    Console.WriteLine(ex.Message);
    // Further handling or logging
}
In this example, the throw; statement rethrows the caught exception, preserving the original stack trace and information. This is particularly useful when you want to handle or perform certain operations within the catch block and then allow the exception to be propagated to a higher-level exception handler.
Choosing the Appropriate Approach:
Deciding between throw ex and throw depends on the specific requirements and context of your code. Here are some considerations to help you make the right choice:
Creating Custom Exceptions: If you need to define custom exception types to encapsulate specific error scenarios and provide additional properties or methods, you can use throw new CustomException("Error message") with throw ex.
Handling and Propagation: If you catch an exception within a specific context, perform necessary operations, and then want to allow the exception to propagate to a higher-level exception handler, you can use throw without an exception object.
Providing Additional Information: If you encounter an exceptional condition and want to provide specific error messages or additional information, you can create a new exception object using throw new Exception("Error message") with throw ex.
Conclusion:
In C#, understanding the differences between throw ex and throw is crucial for effective error handling and exception propagation. Using throw ex allows you to create and throw custom exception objects with specific error messages and additional information. On the other hand, using throw without an exception object rethrows the existing exception, preserving its original context and stack trace. By considering the requirements and context of your code, you can choose the appropriate approach to handle exceptions efficiently in your C# applications.
As a seasoned C# .NET software engineer with over a decade of experience, you’re well aware of the intricacies of this language. However, even experienced developers can make common mistakes that impact code quality, performance, and maintainability. In this blog post, we will explore five big mistakes that C# developers often make in their code and provide examples of each mistake, along with guidance on how to avoid them.
1. Neglecting Proper Exception Handling:
Mistake: Failing to handle exceptions gracefully can lead to application crashes and security vulnerabilities. Novice developers might catch all exceptions indiscriminately or simply ignore them.
Example:
try
{
    // Risky code that may throw exceptions
    int result = 10 / 0;
}
catch (Exception ex)
{
    // Catching all exceptions without handling them specifically
    Console.WriteLine($"An error occurred: {ex.Message}");
}
How to Avoid:
Catch specific exceptions rather than using a generic catch-all block.
Implement exception handling strategies like retrying or logging, depending on the context.
Use finally blocks for resource cleanup, ensuring the application remains stable.
2. Ignoring Performance Implications of LINQ:
Mistake: LINQ is a powerful tool, but using it without considering performance can lead to inefficient queries and slow application response times.
Example:
// Fetching all records from a large dataset and filtering in-memory
var result = data.Where(x => x.Status == "Active").ToList();
How to Avoid:
Profile your LINQ queries to understand their performance impact.
Optimize queries by using appropriate LINQ methods like Where, Select, and OrderBy.
Consider using database optimizations like indexing and stored procedures.
3. Not Utilizing Asynchronous Programming Properly:
Mistake: C# offers robust support for asynchronous programming, but developers often underutilize it, leading to poor responsiveness in applications.
Example:
// Blocking call that freezes the UI
var result = DownloadFileSynchronously(url);
How to Avoid:
Use async and await to perform time-consuming operations asynchronously.
Be mindful of the thread synchronization context, especially in UI applications.
Utilize Task-based parallelism for improved performance.
4. Over-Reliance on Null Checks:
Mistake: Overusing null checks can clutter your code and lead to hard-to-maintain, error-prone codebases.
Example:
if (user != null)
{
    // Do something with the user
}
How to Avoid:
Use the Null Object Pattern to replace nulls with appropriate default objects.
Employ the Maybe monad or Option types for better null handling.
Refactor your code to minimize null checks and utilize nullable value types.
5. Ignoring Code Reusability and Maintainability:
Mistake: Neglecting code reusability and maintainability can result in a tangled mess of code that’s hard to update and extend.
Example:
// Repeated code blocks in different parts of the application
void CalculateTotalOrderPrice(Order order)
{
    // Calculation logic here
}

void CalculateTotalInvoicePrice(Invoice invoice)
{
    // Calculation logic here
}
How to Avoid:
Embrace SOLID principles for better code organization.
Create reusable components, libraries, and helper methods.
Follow coding standards and use meaningful variable and function names.
Conclusion: Even seasoned C# developers can make mistakes in their code. By avoiding these common pitfalls related to exception handling, LINQ usage, asynchronous programming, null checks, and code maintainability, you can significantly improve your code quality, performance, and overall development experience. Stay vigilant, keep learning, and strive for code excellence in every project you undertake.
Recently while I was going through the old code while reviewing I found the below thing in that.
movies.Count() > 0
This code is just an example code, After this, I am in the thought of like in the above code we can use any() instead of count() and then compare that this should be greater than 0(zero). So I am sharing here this kind of top 6 common mistakes people will make usually while using LINQ.
Mistake 1. Use Where().Any()
One common mistake involves using the Where clause followed by Any when the intention is to check if any elements in the collection satisfy a certain condition. Instead of chaining Where and Any, it’s more efficient and clear to use a single Any with a predicate. This mistake often occurs due to a misunderstanding of how Any works.
Here’s an example to illustrate the mistake:
var numbers = new List { 1, 2, 3, 4, 5 };

// Mistake: Using Where followed by Any
bool hasEvenNumber = numbers.Where(n => n % 2 == 0).Any();

// Correct: Using Any with a predicate directly
bool hasEvenNumberCorrect = numbers.Any(n => n % 2 == 0);
In the example above, the mistake involves first filtering the collection using Where to get all even numbers and then using Any to check if any elements are present in the filtered collection. This is redundant and less efficient than using Any directly with the condition.
The correct approach is to use Any with a predicate directly, which checks if any element in the original collection satisfies the specified condition. This avoids unnecessary intermediate collections and improves code readability.
By understanding the behavior of Any and other LINQ operators, developers can write more efficient and concise code. It’s important to be mindful of the capabilities of LINQ and choose the appropriate methods to achieve the desired result.
Mistake 2. Use Count() instead of any()
Another common mistake is using Count when the intention is to check if any elements are satisfying a condition. This mistake can lead to less efficient code since Count iterates through the entire collection to determine the count, whereas Any stops as soon as it finds the first matching element.
Here’s an example illustrating the mistake:
var numbers = new List<int> { 1, 2, 3, 4, 5 };

// Mistake: Using Count to check if any even number exists
bool hasEvenNumberMistake = numbers.Count(n => n % 2 == 0) > 0;

// Correct: Using Any to check if any even number exists
bool hasEvenNumberCorrect = numbers.Any(n => n % 2 == 0);
In the example above, the mistake involves using Count to determine if there are any even numbers in the collection. This is less efficient than using Any because Count needs to iterate through the entire collection, counting all elements that match the condition, even though the information about the existence of a single matching element is sufficient.
The correct approach is to use Any when the goal is to check if any elements in the collection satisfy a condition. This ensures that the iteration stops as soon as a matching element is found.
By using the appropriate LINQ operator based on the specific requirement, developers can write more efficient and readable code. Understanding the characteristics of Any and Count helps in choosing the right method for the task at hand.
Mistake 3: Use FirstOrDefault() without null Check
A common mistake is using FirstOrDefault without checking for null when dealing with a reference type. This mistake can lead to null reference exceptions if the sequence is empty. While FirstOrDefault is designed to return the default value for a type (which is null for reference types) when no matching element is found, it’s essential to check for null to avoid potential issues.
Here’s an example illustrating the mistake:
var numbers = new List<int>();

// Mistake: Using FirstOrDefault without null checking
int firstNumberMistake = numbers.FirstOrDefault();

// This can lead to a null reference exception if the sequence is empty
Console.WriteLine($"The first number is: {firstNumberMistake}");
In this example, if the numbers list is empty, FirstOrDefault will return the default value for int, which is 0. However, if you try to use this value without checking whether an element was found, you might encounter unexpected behavior or runtime errors.
To address this, it’s crucial to check whether an element was found before using the result
var firstNumberCorrect = numbers.FirstOrDefault();

if (firstNumberCorrect != 0)  // Check if an element was found
{
    Console.WriteLine($"The first number is: {firstNumberCorrect}");
}
else
{
    Console.WriteLine("No numbers found in the sequence.");
}
By checking for the default value or null before using the result of FirstOrDefault, you ensure that your code handles both cases appropriately, avoiding potential null reference exceptions and improving robustness.
Mistake 4: Single() vs First()
The Single() and First() methods in LINQ are both used to retrieve elements from a sequence, but they differ in their behavior and the scenarios in which they are appropriate.
1. Single() Method:
The Single() method is used to retrieve the only element from a sequence that satisfies a specified condition.
If the sequence contains more than one element that matches the condition, or if the sequence is empty, it throws an InvalidOperationException.
Use Single() when you expect exactly one element to satisfy the condition, and an exception should be thrown if the condition is not met or if there is more than one matching element.
Example:
var singleEven = numbers.Single(n => n % 2 == 0);
2. First() Method:
The First() method, on the other hand, is used to retrieve the first element from a sequence that satisfies a specified condition.
It does not guarantee that the returned element is the only one satisfying the condition; it just returns the first matching element.
If the sequence is empty, it throws an InvalidOperationException.
Use First() when you want the first element that satisfies the condition, and it’s acceptable if multiple elements match the condition.
Example
var firstEven = numbers.First(n => n % 2 == 0);
Choosing between Single() and First() depends on the specific requirements of your code. If you expect exactly one matching element and want an exception if that condition is not met or if there are multiple matches, use Single(). If you just want the first matching element and don’t mind if there are others, use First().
It’s important to note that using Single() or First() without a predicate will return the only or first element in the sequence, respectively, and they behave similarly in that case.
Mistake 5: Where().First()
Using Where().First() is a common pattern in LINQ where you filter a sequence using the Where clause to find elements that match a certain condition and then retrieve the first element from the filtered sequence using the First method. This approach is useful when you want the first element that satisfies a specific condition. However, it’s essential to be aware that it has the potential to be less efficient than using First with a predicate directly.
Here’s an example:
var numbers = new List<int> { 1, 2, 3, 4, 5 };

// Using Where().First() to get the first even number
int firstEven = numbers.Where(n => n % 2 == 0).First();
In this example, the Where clause filters the list to include only even numbers, and then First retrieves the first element from the filtered sequence. While this works, it involves creating an intermediate sequence (the filtered list of even numbers) before getting the first element.
A potentially more efficient and concise way to achieve the same result is to use First with a predicate directly:
int firstEven = numbers.First(n => n % 2 == 0);
This approach directly retrieves the first element that satisfies the specified condition without creating an intermediate sequence. It can be more efficient, especially for large datasets, as it doesn’t involve building a separate filtered list.
In summary, while Where().First() is a valid and readable approach, consider using First with a predicate directly when you only need the first element that satisfies a condition, as it can be more efficient.
Mistake 6: Overlooking Deferred Loading in Entity Framework:
The mistake of overlooking deferred loading in Entity Framework can lead to inefficient database queries and performance issues in applications. Entity Framework, by default, uses a feature known as lazy loading for navigation properties, meaning related entities are loaded from the database only when they are accessed. Failing to understand and manage deferred loading can result in the N+1 query problem and degrade the overall performance of an application.
Here are the key aspects of the mistake and how to avoid it:
Understanding Deferred Loading:
Lazy loading in Entity Framework defers the loading of related entities until they are explicitly accessed in code.
If a navigation property is not loaded when querying the main entity, additional database queries may be executed when accessing related entities, leading to the N+1 query problem.
N+1 Query Problem:
The N+1 query problem occurs when a query for a list of entities results in N additional queries to fetch related entities for each of the N entities, significantly increasing the number of database round-trips.
This can happen when iterating through a collection of entities with navigation properties.
How to Avoid the Mistake:
Use eager loading with methods like Include to explicitly specify which related entities to load along with the main entity. This reduces the number of database queries and avoids the N+1 problem.
Consider using the ToList() or ToArray() methods to materialize the result and load related entities eagerly.
Example:
// Mistake: Deferred loading leading to N+1 queries
var orders = dbContext.Orders.ToList();
foreach (var order in orders)
{
    Console.WriteLine(order.Customer.Name); // N additional queries for each order
}

// Correct: Using eager loading to fetch related entities in a single query
var ordersWithCustomers = dbContext.Orders.Include(o => o.Customer).ToList();
foreach (var order in ordersWithCustomers)
{
    Console.WriteLine(order.Customer.Name); // No additional queries
}
Disabling Lazy Loading:
If lazy loading is not needed or if it causes performance issues, it can be disabled globally or selectively for specific queries or entities using the DbContextConfiguration.
Example:
// Disable lazy loading for the entire context
dbContext.Configuration.LazyLoadingEnabled = false;
Note: While disabling lazy loading can help avoid the N+1 problem, it’s essential to be mindful of the potential impact on application behavior and memory usage.
By understanding and addressing deferred loading in Entity Framework, developers can optimize database queries and enhance the overall performance of applications, especially when dealing with large datasets or complex object graphs. It’s crucial to use tools provided by Entity Framework, such as eager loading, to manage loading behavior effectively.
Conclusion
Delving into LINQ, we encounter seemingly straightforward concepts that can often be overlooked in the midst of coding. One such subtlety is the lazy evaluation inherent in LINQ queries, where execution is deferred until the results are explicitly needed. If you’re hungry for a deeper understanding of LINQ and its nuances, explore my Quick Guide to LINQ for a comprehensive overview. Additionally, I’ve crafted an illustrative resource, Five Common LINQ Methods in Pictures, to elucidate the usage of fundamental LINQ methods with visual clarity. For those seeking mastery of the GroupBy method, a dedicated guide awaits, ensuring you navigate this powerful feature with confidence. These resources aim to empower developers of all levels, shedding light on LINQ’s intricacies and helping you steer clear of common pitfalls. Happy coding!
Microsoft SQL Server is a popular relational database management system used by businesses of all sizes to store and manage their data. As with any software, there are best practices that developers should follow to ensure that their SQL Server databases are efficient, reliable, and secure. In this blog post, we’ll explore some of the best practices that developers should follow when working with SQL Server.
Use parameterized queries Parameterized queries help to prevent SQL injection attacks and improve performance by allowing SQL Server to reuse query execution plans. Always use parameterized queries instead of concatenating user input into SQL queries.
Normalize your data Normalization is the process of organizing data in a database to reduce redundancy and dependency. Normalized data leads to better performance, easier maintenance, and fewer errors.
Use stored procedures Stored procedures are pre-compiled blocks of SQL code that can be reused throughout an application. They improve performance and security by reducing the amount of SQL code sent over the network and protecting against SQL injection attacks.
Optimize indexing Indexing can significantly improve query performance, but it’s important to use it correctly. Index only the columns that are frequently used in queries, avoid over-indexing, and regularly review and optimize your indexes.
Implement backup and recovery plans A backup and recovery plan is essential to protect your data from accidental loss or corruption. Regularly back up your database and test your recovery process to ensure that you can recover data in case of a disaster.
Use transactions Transactions help to ensure data consistency and integrity by allowing you to group multiple operations into a single transaction that is either committed or rolled back as a whole. Use transactions to avoid partial updates and ensure that your data is always in a valid state.|
Monitor database performance Regularly monitor your database’s performance using tools like SQL Server Management Studio and SQL Server Profiler. Analyze performance metrics like CPU usage, memory usage, and disk I/O to identify and resolve performance issues.
Implement security best practices Implement security best practices to protect your database from unauthorized access and data breaches. This includes using strong passwords, limiting access to sensitive data, and regularly auditing and reviewing your security policies.
In conclusion, following these best practices can help SQL Server developers to build efficient, reliable, and secure databases. By adopting these practices, you can improve the performance and security of your SQL Server databases and ensure that they meet the needs of your business
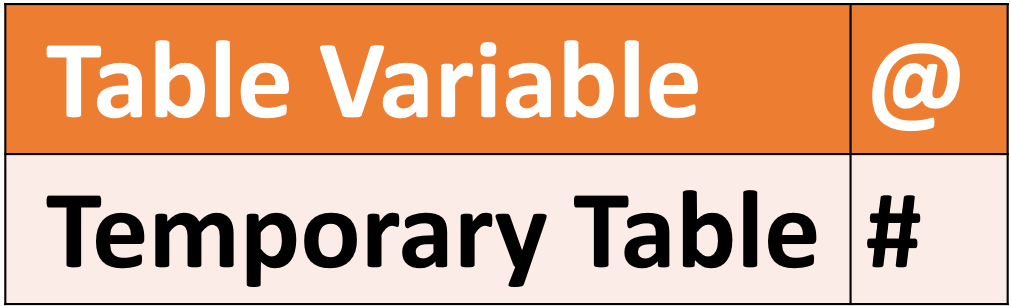
When it comes to storing temporary data within SQL Server, two primary options are widely used: temp tables and table variables. While both provide temporary storage capabilities, they have distinct characteristics and usage scenarios. Understanding the differences between these two options is crucial for optimizing performance and ensuring efficient data manipulation. In this blog post, we’ll delve into the features, advantages, and considerations of temp tables and table variables in SQL Server.
Temp Tables:
Temp tables are temporary database objects stored in the TempDB system database. They function similarly to regular tables but are automatically dropped when the session or connection that created them is terminated. Here are some key points to consider:
Structure and Manipulation:
Temp tables are explicitly created using the CREATE TABLE statement and can have indexes, constraints, and triggers, just like regular tables.
They can be modified using standard DML (Data Manipulation Language) statements such as INSERT, UPDATE, and DELETE.
Temp tables can be either global (accessible across different connections) or local (accessible only within the current session).
Scope and Visibility:
Temp tables are visible to all sessions or connections, depending on whether they are global or local.
They can be shared among different queries or stored procedures within the same session or connection.
Performance Considerations:
Temp tables involve disk I/O operations as they are stored in the TempDB database, which can impact performance, especially with large data volumes.
Creation and deletion of temp tables incur additional overhead, so they should be used judiciously.
Table Variables:
Table variables also provide temporary storage but differ from temp tables in several aspects. Here’s what you need to know about table variables:
Structure and Manipulation:
Table variables are declared using the DECLARE statement, followed by the table structure definition.
They do not support indexes, constraints, or triggers.
Table variables can be manipulated using INSERT, UPDATE, and DELETE statements, similar to temp tables.
Scope and Visibility:
Table variables are local to the current session or connection and cannot be shared across different sessions.
They are only visible within the batch, stored procedure, or function where they are declared.
Performance Considerations:
Table variables are typically stored in memory, reducing disk I/O and improving performance.
They are suitable for handling smaller result sets or intermediate data within a query.
Unlike temp tables, table variables do not generate statistics, which can affect query optimization.
Choosing the Right Option:
Determining whether to use temp tables or table variables depends on your specific requirements. Consider the following factors when making your choice:
Data Size:
For larger data sets, temp tables may be more efficient due to their ability to utilize disk storage effectively.
For smaller result sets, table variables’ in-memory storage can offer better performance.
Data Manipulation:
If you require indexes, constraints, or triggers, temp tables are the appropriate choice.
If simplicity and ease of use are paramount, table variables provide a lightweight option.
Query Optimization:
Temp tables can benefit from query optimization and generate statistics, enabling the SQL Server query optimizer to make better decisions.
Table variables may not provide the same level of optimization opportunities due to the absence of statistics.
Here’s an example that demonstrates how you can compare the performance of temp tables and table variables in SQL Server. I have used the sample database AdventureWorks2019 for the below query:
-- Create a temp table
CREATE TABLE #TempTable (ID INT, Name VARCHAR(100))

-- Declare a table variable
DECLARE @TableVariable TABLE (ID INT, Name VARCHAR(100))

-- Populate the temp table and table variable with data
INSERT INTO #TempTable (ID, Name)
SELECT BusinessEntityID, FirstName
FROM [Person].[Person]

INSERT INTO @TableVariable (ID, Name)
SELECT BusinessEntityID, FirstName
FROM [Person].[Person]

-- Perform operations on temp table
SELECT *
FROM #TempTable
WHERE Name LIKE 'John%'

-- Perform operations on table variable
SELECT *
FROM @TableVariable
WHERE Name LIKE 'John%'

-- Clean up
DROP TABLE #TempTable
Let’s Compare Execution Plan to view performance. Here you can see temp table has 3% query cost while table variable has 0% cost.
Conclusion:
Temp tables and table variables are vital tools in SQL Server for handling temporary data. Understanding their differences and considering your specific requirements is essential for achieving optimal performance. Temp tables offer more flexibility with their index and constraint support, while table variables excel in simplicity and in-memory performance. By carefully evaluating your data size, manipulation needs, and query optimization requirements, you can select the appropriate option and effectively leverage the power of temporary storage in SQL Server.
LINQ (Language Integrated Query) is a powerful feature in C# that empowers developers to query and manipulate data efficiently. When using LINQ, developers often encounter the question of whether to use Select.Where or Where.Select. In this article, we will explore the differences between these approaches and discuss when to use each one.
Before we delve into the comparison, let’s first understand the fundamental concepts of Select and Where in LINQ.
Select is used for projecting or transforming elements of a sequence into a new form. It applies a specified transformation function to each element and returns a new sequence with the transformed values.
Where is used for filtering elements from a sequence based on a specified condition. It applies a predicate function to each element and returns a new sequence that contains only the elements satisfying the condition.
Now, let’s compare Select.Where and Where.Select to understand their differences and determine the appropriate usage for each.
1. Select.Where:
With Select.Where, the filtering operation (Where) is applied after the projection operation (Select). This means that the transformation function specified in Select is executed first, followed by the filtering condition applied to the transformed elements.
This approach is beneficial when you need to filter the results based on a condition that depends on the projected values. For example, consider a list of integers representing ages of students, and you want to retrieve only the ages greater than 18 and then convert them into strings. Here’s an example:
var ages = new List<int> { 16, 22, 18, 25, 20 };

var filteredAges = ages.Select(age => age.ToString())
                       .Where(ageString => int.Parse(ageString) > 18);

foreach (var ageString in filteredAges)
{
    Console.WriteLine(ageString);
}
In this example, the Select function is used to convert each age into a string representation, and then Where is applied to filter out the ages greater than 18. The resulting filteredAges sequence will contain only the string representations of ages that meet the specified condition.
2. Where.Select:
Conversely, with Where.Select, the projection operation (Select) is applied after the filtering operation (Where). This means that the filtering condition specified in Where is executed first, and then the transformation function is applied to the filtered elements.
This approach is valuable when you need to transform the filtered elements into a new form. For example, consider a collection of products, and you want to retrieve only the products with a price greater than $50 and then extract their names. Here’s an example:
public class Product
{
    public string Name { get; set; }
    public decimal Price { get; set; }
}

var products = new List<Product>
{
    new Product { Name = "Laptop", Price = 1000 },
    new Product { Name = "Headphones", Price = 75 },
    new Product { Name = "Keyboard", Price = 40 },
    new Product { Name = "Monitor", Price = 300 }
};

var filteredProductNames = products.Where(product => product.Price > 50)
                                   .Select(product => product.Name);

foreach (var productName in filteredProductNames)
{
    Console.WriteLine(productName);
}
In this example, the Where function is used to filter out the products with a price greater than $50, and then Select is applied to extract their names. The resulting filteredProductNames sequence will contain only the names of products that meet the specified condition.
Compares the performance of Select.Where and Where.Select
Here’s an example code snippet that compares the performance of Select.Where and Where.Select using a benchmarking library called BenchmarkDotNet:
using System;
using System.Collections.Generic;
using BenchmarkDotNet.Attributes;
using BenchmarkDotNet.Running;

public class Benchmarks
{
    private readonly List<int> numbers;

    public Benchmarks()
    {
        numbers = new List<int>(Enumerable.Range(0, 100000));
    }

    [Benchmark(Baseline = true)]
    public List<int> SelectWhere()
    {
        return numbers.Select(n => n * 2)
                      .Where(n => n % 3 == 0)
                      .ToList();
    }

    [Benchmark]
    public List<int> WhereSelect()
    {
        return numbers.Where(n => n % 3 == 0)
                      .Select(n => n * 2)
                      .ToList();
    }
}

public class Program
{
    public static void Main()
    {
        var summary = BenchmarkRunner.Run<Benchmarks>();
    }
}
In this example, we define a Benchmarks a class that includes two benchmark methods: SelectWhere and WhereSelect. The SelectWhere method applies Select first to double each number, and then Where is used to filter the numbers divisible by 3. On the other hand, the WhereSelect method applies Where first to filter numbers divisible by 3, and then Select is used to double the filtered numbers.
To run the benchmarks, we use the BenchmarkRunner.Run method in the Main method of the Program class. The output will include the execution times for both methods, allowing you to compare their performance.
Make sure to install the BenchmarkDotNet NuGet package and include the necessary using statements for the code to compile successfully.
By running this code, you can measure and compare the performance of Select.Where and Where.Select in terms of execution time, which will give you insights into their efficiency and help you make informed decisions when choosing the appropriate approach for your specific scenarios. here is a screenshot of the summary after running the above code.
In summary, It is important to understand the impact of function order in LINQ and how it can affect performance. As a best practice, it is recommended to apply filtering operations early in the LINQ query to minimize the creation of unnecessary objects.
Both approaches offer flexibility in LINQ and enable developers to write concise and expressive code. By understanding their differences and use cases, you can leverage the full power of LINQ in your applications.
Deploying an ASP .NET Core application to a production environment can be a daunting task. However, there are several options available that make it easier to deploy and manage your application. In this guide, we’ll cover some of the most common deployment options for ASP .NET Core applications, including deploying to Azure, AWS, and Docker containers.
Deploying to Azure
Azure is a cloud computing platform and service provided by Microsoft. It provides a wide range of services for hosting, managing, and deploying applications. Azure is a popular choice for hosting ASP .NET Core applications due to its easy integration with Visual Studio and its scalable infrastructure.
To deploy an ASP .NET Core application to Azure, you can use the Azure App Service. This service provides a managed platform for hosting web applications and can be easily integrated with Azure DevOps or other CI/CD pipelines.
Here are the general steps for deploying an ASP .NET Core application to Azure:
Create an Azure App Service instance and configure it to use the appropriate operating system and runtime for your application.
Build and publish your ASP .NET Core application.
Deploy the published application to the Azure App Service instance using a deployment tool like Azure DevOps or the Azure Portal.
Deploying to AWS
AWS (Amazon Web Services) is a cloud computing platform provided by Amazon. It provides a wide range of services for hosting, managing, and deploying applications. AWS is a popular choice for hosting ASP .NET Core applications due to its scalable infrastructure and flexible pricing options.
To deploy an ASP .NET Core application to AWS, you can use the Elastic Beanstalk service. This service provides a managed platform for hosting web applications and can be easily integrated with AWS CodeDeploy or other CI/CD pipelines.
Here are the general steps for deploying an ASP .NET Core application to AWS:
Create an Elastic Beanstalk environment and configure it to use the appropriate operating system and runtime for your application.
Build and publish your ASP .NET Core application.
Deploy the published application to the Elastic Beanstalk environment using a deployment tool like AWS CodeDeploy or the AWS Management Console.
Deploying to Docker Containers
Docker is a platform for building, shipping, and running applications in containers. Containers provide an isolated environment for running applications, making them a popular choice for deploying ASP .NET Core applications.
To deploy an ASP .NET Core application to Docker containers, you can use the Docker platform. This platform provides a wide range of tools and services for building, managing, and deploying containers.
Here are the general steps for deploying an ASP .NET Core application to Docker containers:
Create a Docker image of your ASP .NET Core application.
Push the Docker image to a container registry like Docker Hub or Azure Container Registry.
Deploy the Docker image to a container host like Amazon Elastic Container Service or Azure Container Instances.
Conclusion
Deploying an ASP .NET Core application can be a complex task, but there are many options available for simplifying the process. Whether you choose to deploy to Azure, AWS, or Docker containers, each platform has its own benefits and drawbacks. By understanding the different deployment options available, you can choose the one that best suits your application’s needs and requirements.
Testing is a crucial aspect of software development. It helps ensure that your application functions correctly and meets the requirements of your users. In this post, we’ll explore the different testing strategies for ASP .NET Core applications, including unit testing, integration testing, and end-to-end testing.
Testing is an essential part of software development. It ensures that the code is working as expected and helps to catch bugs early in the development cycle. In this post, we’ll explore the different testing strategies for ASP .NET Core applications.
Unit Testing
Unit testing is a type of testing that focuses on testing individual components or units of code. In ASP .NET Core applications, unit testing is typically done using a testing framework such as xUnit or NUnit. Unit tests are fast and efficient, and they can catch most bugs before they propagate to other parts of the code.
Here’s an example of a simple unit test for an ASP .NET Core controller:
public class TodoControllerTests
{
    private readonly TodoController _controller;
    private readonly Mock<ITodoRepository> _mockRepository;

    public TodoControllerTests()
    {
        _mockRepository = new Mock<ITodoRepository>();
        _controller = new TodoController(_mockRepository.Object);
    }

    [Fact]
    public async Task Get_ReturnsListOfTodos()
    {
        // Arrange
        var todos = new List<Todo>
        {
            new Todo { Id = 1, Name = "Todo 1" },
            new Todo { Id = 2, Name = "Todo 2" }
        };

        _mockRepository.Setup(repo => repo.GetAll()).ReturnsAsync(todos);

        // Act
        var result = await _controller.Get();

        // Assert
        var okResult = Assert.IsType<OkObjectResult>(result);
        var model = Assert.IsAssignableFrom<IEnumerable<Todo>>(okResult.Value);
        Assert.Equal(2, model.Count());
    }
}
This test verifies that the Get method of the TodoController returns a list of todos.
Integration Testing
Integration testing is a type of testing that focuses on testing the interaction between different components or units of code. In ASP .NET Core applications, integration testing is typically done using the built-in TestServer class or a third-party testing framework such as Selenium or Puppeteer. Integration tests are slower than unit tests, but they can catch bugs that unit tests may miss.
Here’s an example of a simple integration test for an ASP .NET Core controller:
public class TodoControllerIntegrationTests : IClassFixture<WebApplicationFactory<Startup>>
{
    private readonly WebApplicationFactory<Startup> _factory;

    public TodoControllerIntegrationTests(WebApplicationFactory<Startup> factory)
    {
        _factory = factory;
    }

    [Fact]
    public async Task Get_ReturnsListOfTodos()
    {
        // Arrange
        var client = _factory.CreateClient();

        // Act
        var response = await client.GetAsync("/api/todo");
        response.EnsureSuccessStatusCode();
        var todos = await response.Content.ReadAsAsync<IEnumerable<Todo>>();

        // Assert
        Assert.Equal(2, todos.Count());
    }
}
This test verifies that the Get method of the TodoController returns a list of todos by making a HTTP request to the API and verifying the response.
End-to-End Testing
End-to-end testing is a type of testing that focuses on testing the entire application from end-to-end. In ASP .NET Core applications, end-to-end testing is typically done using a third-party testing framework such as Selenium or Cypress. End-to-end tests are slowest among all the testing strategies, but they can catch bugs that unit and integration tests may miss.
Once we have our test environment set up, we can start writing end-to-end tests. In this example, we’ll write a simple end-to-end test that navigates to the homepage of our ASP .NET Core application, clicks on a link, and verifies that the link takes us to the correct page.
Here’s the code for our end-to-end test:
csharpCopy codeusing System;
using OpenQA.Selenium;
using OpenQA.Selenium.Chrome;
using NUnit.Framework;

namespace MyProject.Tests
{
    [TestFixture]
    public class EndToEndTests : IDisposable
    {
        private IWebDriver _driver;
        private string _baseUrl;

        public EndToEndTests()
        {
            _driver = new ChromeDriver();
            _baseUrl = "https://localhost:5001";
        }

        public void Dispose()
        {
            _driver.Quit();
        }

        [Test]
        public void HomePage_Should_NavigateToAboutPage()
        {
            // Arrange
            _driver.Navigate().GoToUrl(_baseUrl);

            // Act
            var link = _driver.FindElement(By.LinkText("About"));
            link.Click();

            // Assert
            Assert.AreEqual($"{_baseUrl}/Home/About", _driver.Url);
        }
    }
}
Let’s break down what’s happening in this test.
First, we create a new instance of the ChromeDriver class and set the base URL of our ASP .NET Core application. We then create a test method called HomePage_Should_NavigateToAboutPage.
In the test method, we first navigate to the homepage of our ASP .NET Core application using the Navigate method of the ChromeDriver class. We then find the link with the text “About” using the FindElement method of the ChromeDriver class and click on it using the Click method.
Finally, we verify that we’ve been taken to the correct page by checking the URL of the current page using the Url property of the ChromeDriver class.
Running End-to-End Tests
To run our end-to-end tests, we can use the testing framework’s test runner. In Visual Studio, we can right-click on our test project and select “Run Tests” to run all the tests in the project.
Alternatively, we can use the command-line interface to run our tests. In the root directory of our test project, we can run the following command to run all the tests in the project:
dotnet test
Conclusion
Testing is an essential aspect of software development, and ASP .NET Core provides a range of testing tools and frameworks to make the process easier. Whether you’re writing unit tests, integration tests, or end-to-end tests, it’s important to ensure that your application is functioning correctly and meeting the needs of your users. By following the different testing strategies discussed above, you can improve the quality of your ASP .NET Core applications and deliver better user experiences.
In today’s fast-paced world, real-time communication has become increasingly important. Whether it’s for chat applications, multiplayer games, or collaborative tools, the ability to exchange data in real-time is critical. SignalR is a real-time communication library for ASP .NET Core that enables bi-directional communication between the server and clients. In this post, we’ll explore what SignalR is and how to use it.
What is SignalR?
SignalR is an open-source library that provides real-time web functionality to web applications. It allows server-side code to push content to connected clients in real-time, eliminating the need for clients to repeatedly poll the server for updates. SignalR supports WebSockets, Server-Sent Events (SSE), and long polling as communication protocols, falling back to the next best protocol based on the capabilities of the client and server.
How to use SignalR?
To use SignalR in an ASP .NET Core application, follow these steps:
Step 1: Install SignalR
First, install the SignalR package from NuGet by running the following command in the Package Manager Console:
A SignalR hub is a class that derives from the Microsoft.AspNetCore.SignalR.Hub class. It is responsible for managing connections between clients and the server. In the hub, you define methods that clients can invoke, and you can also define methods that the server can invoke to send messages to the clients. Here’s an example of a simple chat hub:
using Microsoft.AspNetCore.SignalR;
using System.Threading.Tasks;

namespace SignalRChat.Hubs
{
    public class ChatHub : Hub
    {
        public async Task SendMessage(string user, string message)
        {
            await Clients.All.SendAsync("ReceiveMessage", user, message);
        }
    }
}
This hub has a method called SendMessage that accepts a user name and a message. The method then broadcasts the message to all connected clients by invoking the ReceiveMessage method on the clients.
Step 3: Configure SignalR in Startup.cs
In the Startup.cs file, add the following code to the ConfigureServices method to configure SignalR:
services.AddSignalR();
In the Configure method, add the following code to map the SignalR hub:
This code loads the SignalR JavaScript library from the specified URL.
Step 5: Connect to the Hub from the Client
Finally, to connect to the hub from the client, add the following code to your JavaScript:
var connection = new signalR.HubConnectionBuilder().withUrl("/chatHub").build();

connection.on("ReceiveMessage", function (user, message) {
    // Handle received message
});

connection.start().catch(function (err) {
    console.error(err.toString());
});
This code creates a new connection to the /chatHub URL and defines a callback for the ReceiveMessage method. It then starts the connection and logs any errors to the console.
Conclusion
SignalR is a powerful library that allows you to build real-time communication applications with ease. Whether you’re building a chat application or a multiplayer game, SignalR can help you deliver real-time experiences to your users.
Caching is a technique used to improve the performance and scalability of web applications. By storing frequently accessed data in cache memory, we can reduce the number of requests to the database or other data sources, resulting in faster response times and reduced server load.
ASP .NET Core provides several caching mechanisms that can be used to implement caching in web applications. In this blog post, we will discuss three of the most commonly used caching mechanisms in ASP .NET Core: in-memory caching, distributed caching, and response caching.
In-Memory Caching
In-memory caching is a simple caching mechanism that allows you to store data in memory. This can be useful if you have data that is accessed frequently and is expensive to retrieve, such as configuration data or user-specific data. In-memory caching is fast and efficient, as it does not require any external dependencies. However, it is limited to a single server and does not provide any high availability or scalability features.
To implement in-memory caching in ASP .NET Core, you can use the built-in MemoryCache class. This class provides methods to add, retrieve, and remove items from the cache. Here’s an example of how to use MemoryCache in your ASP .NET Core application:
public class HomeController : Controller
{
    private readonly IMemoryCache _cache;

    public HomeController(IMemoryCache cache)
    {
        _cache = cache;
    }

    public IActionResult Index()
    {
        string cachedData = _cache.Get<string>("myCachedData");

        if (cachedData == null)
        {
            // If data is not in cache, retrieve it from database or other data source
            cachedData = GetDataFromDatabase();
            _cache.Set("myCachedData", cachedData, TimeSpan.FromMinutes(10));
        }

        return View(cachedData);
    }
}
In this example, we first try to retrieve the data from the cache using the Get method. If the data is not in the cache, we retrieve it from the database and store it in the cache using the Set method. We also set an expiration time of 10 minutes using the TimeSpan.FromMinutes method.
Distributed Caching
Distributed caching is a caching mechanism that allows you to store data in a distributed cache server, such as Redis or Memcached. Distributed caching provides high availability and scalability features, as it allows multiple servers to share the same cache. This can be useful if you have a web application that is deployed across multiple servers, as it allows each server to access the same cache.
To implement distributed caching in ASP .NET Core, you can use the IDistributedCache interface. This interface provides methods to add, retrieve, and remove items from the cache. Here’s an example of how to use IDistributedCache in your ASP .NET Core application:
public class HomeController : Controller
{
    private readonly IDistributedCache _cache;

    public HomeController(IDistributedCache cache)
    {
        _cache = cache;
    }

    public IActionResult Index()
    {
        string cachedData = Encoding.UTF8.GetString(_cache.Get("myCachedData"));

        if (cachedData == null)
        {
            // If data is not in cache, retrieve it from database or other data source
            cachedData = GetDataFromDatabase();
            _cache.Set("myCachedData", Encoding.UTF8.GetBytes(cachedData), new DistributedCacheEntryOptions
            {
                AbsoluteExpirationRelativeToNow = TimeSpan.FromMinutes(10)
            });
        }

        return View(cachedData);
    }
}
In this example, we first try to retrieve the data from the distributed cache using the Get method. If the data is not in the cache, we retrieve it from the database and store it in the distributed cache using the Set method. We also set an expiration time of 10 minutes using the DistributedCacheEntryOptions class.
Response Caching
Response caching is a technique that allows you to cache the responses of your web application’s API endpoints, so that subsequent requests for the same data can be served more quickly. Response caching can be especially useful if you have API endpoints that return data that does not change frequently, such as product information or weather forecasts.
In ASP .NET Core, you can implement response caching using the built-in Response Caching Middleware. The Response Caching Middleware stores the HTTP response in memory or on disk, based on the cache policy you configure. The next time a client requests the same resource, the middleware can serve the cached response instead of generating a new one.
Here’s an example of how to implement response caching in ASP .NET Core:
[ApiController]
[Route("api/[controller]")]
[ResponseCache(Duration = 300)]
public class WeatherForecastController : ControllerBase
{
    private readonly ILogger<WeatherForecastController> _logger;

    public WeatherForecastController(ILogger<WeatherForecastController> logger)
    {
        _logger = logger;
    }

    [HttpGet]
    public IEnumerable<WeatherForecast> Get()
    {
        var rng = new Random();
        return Enumerable.Range(1, 5).Select(index => new WeatherForecast
        {
            Date = DateTime.Now.AddDays(index),
            TemperatureC = rng.Next(-20, 55),
            Summary = Summaries[rng.Next(Summaries.Length)]
        })
        .ToArray();
    }
}
In this example, we decorate our WeatherForecastController class with the [ResponseCache] attribute, which enables response caching for all actions in the controller. The Duration parameter specifies the time in seconds that the response should be cached. In this case, the response will be cached for 300 seconds (5 minutes).
When a client requests the /api/WeatherForecast endpoint, the middleware will check the cache for a response. If a response is found and is not stale, the middleware will return the cached response. If a response is not found, the middleware will execute the action and store the response in the cache.
Response caching is a powerful caching mechanism that can improve the performance of your API endpoints. However, it is important to use it judiciously and consider the cacheability of your responses carefully. You should also test your caching strategy thoroughly to ensure that your application behaves correctly in all scenarios.